(This post has been updated (2015) to reflect new changes in Blogger templates.)
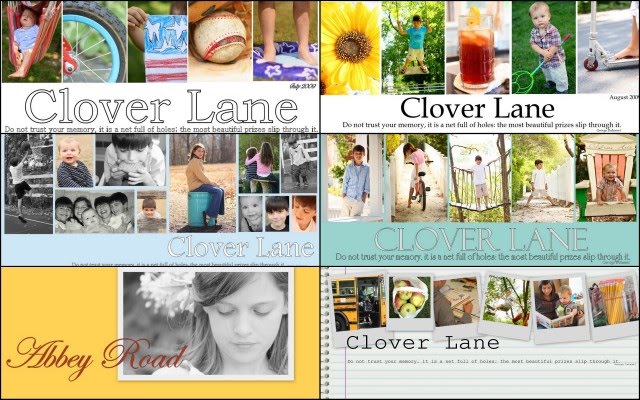 (a few examples of past headers I've made)
I’ve been asked SO many times how I make my collage header (also called banner) images. I came upon this free and easy way to make your Blogger blog look more original and professional...I was desperate and didn't want to pay for a blog designer, and didn't have time to learn Photoshop...I also LOVE the design process of changing things up once a month.
You will want to choose the Simple template in the Design section of Blogger.
I promised a tutorial a long time ago, but knew I’d have to wait till the kids went back to school to spend the time to put on together. So here it goes.
First you need to download Picasa. It’s free and it should be easy to figure out how to get your pictures from your files into Picasa. Picasa is 'made' by Google and it won't make your computer blow up, or slow down, or act really weird...I swear. I really love using it…I’ve tried almost everything, and I think this is the best (and most self-explanatory) FREE editing system out there…especially if you are using Blogger. I am really not very computer savvy, and I don't have the time to learn Photoshop right now, try as a might. So I've squeezed every ounce of juice out of Picasa and have been very happy with the results.
Once you download Picasa, it is easy to figure out how to 'Import' (there's a button) your pictures from your files into Picasa. (You can do them a file at a time just to see if you like it.)
SO, let’s say you are in Picasa and you want to select 4 or 5 pictures (you will see, once you experiment, that a header can be made with a bunch of photos or just one and still look good).
 You are going to select a photo and press the Collage button on the bottom of the window. (You can edit your pic first if you want....see the left hand side for tons of options.)
 In the Settings choices, you will choose Picture Pile because it allows you to work with a bunch of photos and manipulate them around in tons of ways.
  Click and hold on your photo and drag it to the corner (or wherever you want it). (By the way…you can see that you can select different colors for the background…experiment away…the possibilities are endless. Also under background options you can select "Use Image". You can download free scrapbook paper and import that into Picasa and use that as a background image if you want something besides a solid color. I did this from here. You will see in my September banner I have chosen a pattern, but the one I have for August I chose a white background.)
  See that little grey circle on the photo? That allows you to make the photo bigger or smaller and also allows you to manipulate the angle…crooked or straight, and allows you to move it everywhere. If you look in the Settings box, you can also chose to add a white border, or a Polaroid border, or create a shadow on your photo.
 Now you want to add more pictures. Click Clips right next to Settings. If you don’t see the photos you want to add go to Get More and it will take you back to your Picasa files. Click on your pictures there and then go back to the Collage file on top…see that button…next to Library. The picture you clicked on will show up in the little Collage window. Press the + button and it will be added. If you change your mind click on the photo you don’t want and press Remove. (You can also press View And Edit if you decide you want to use some of the cool editing features in Picasa to make your picture better-looking.)
 For this example, I am lining up my photos as straight and evenly spaced as I can get them. Remember, the possibilities are endless though...they don't have to be straight. I DO try to keep them on the top 1/2 of the collage..yes, it looks funny at first, but you want your collage to be long and skinny..you will crop that bottom half off later, after you add text. Just work with the top 1/2 when making a header.
 When I’m set I press Create Collage.
 That brings me back to the main Picasa page. I find my created Collage in the Library file, and click on it. Now what comes up is the basic editing features…Basic Fixes.
 I find the Text button and press that…there you have TONS of choices of type. Play around and see what you like best…this is the “funnest” part…you can move the text where ever you want (even on top of the photos), make it whatever size you want (keep it on the page!), pick the opacity of the text, and determine the color you want it…it has the same grey circle that you manipulate around. Remember though…you want it rather long and skinny like a header normally looks so keep it up there in the 1/2 of the space provided.
 If you want to create a whole different grouping text, you can do that too. Just click the phrase you are finished with and move your cursor to a new spot…it doesn’t have to be the spot you want the type to show up, because remember…you can move it. Now you can choose the color, font and size of your new phrase.
 After you have your words down, click the Apply button and you will go back to the basic Edits. You are going to Crop your Collage so it looks like a header, not a huge photo, so press Crop. I make it really even on all sides and bring the crop right up under the writing.
  Press Apply when you are finished.
 You are going to Export (see that button on the bottom?) your collage to your photo files. When you press Export a window like this will show up. That little slider bar lets you choose the size.
I used 800 for my banner.


NOW, go to your blog and press the Layout tab. Press Edit on the header part (where your title is.) Choose your Image (your collage) from your Files where you sent it. Make sure you press the “Instead of title and description” button first, and make sure the Shrink To Fit button is NOT checked before you upload your picture.
 Press Save. If the Collage seems too big for you, just resend your collage at the next smaller size when Exporting to your photo files from Picasa.
If the blog banner isn't centered, you will need to go into the Template, go to "Customize", find Advanced, scroll down to CSS, and copy and past this code to the CSS:
#header-inner img {margin: 0 auto;}
Press Enter (you can see your blog header move to the center after pressing Enter) and then Save.
Here's some great advice: Start a new blog...a sample, "fool around" blog, and just try stuff out on it. Google some tutorials...that's how I learned. In your Settings, you can choose to make that Sample Blog private, and hide it on your profile so no one sees it. Then play away! You can see how things look on your Sample Blog first, practice, and then try it out on your new blog.
Check out these cute headers made from this tutorial:
I'm so proud of you! (and I'm proud of me too, for actually explaining something and having it make any sense for once.)
Melissa's
Tawny's
Rachel's
Jennifer's
Beth's
Mandy's
Abbey's
Donna's
Casey's
Jodi's
Lindley's
Jaclyn's
Kelly's
Vicki's
Jenny's
Sara's
Cheryl's
(If you have one you would like to share, leave a comment below!)
 (a few examples of past headers I've made)
I’ve been asked SO many times how I make my collage header (also called banner) images. I came upon this free and easy way to make your Blogger blog look more original and professional...I was desperate and didn't want to pay for a blog designer, and didn't have time to learn Photoshop...I also LOVE the design process of changing things up once a month.
You will want to choose the Simple template in the Design section of Blogger.
I promised a tutorial a long time ago, but knew I’d have to wait till the kids went back to school to spend the time to put on together. So here it goes.
First you need to download Picasa. It’s free and it should be easy to figure out how to get your pictures from your files into Picasa. Picasa is 'made' by Google and it won't make your computer blow up, or slow down, or act really weird...I swear. I really love using it…I’ve tried almost everything, and I think this is the best (and most self-explanatory) FREE editing system out there…especially if you are using Blogger. I am really not very computer savvy, and I don't have the time to learn Photoshop right now, try as a might. So I've squeezed every ounce of juice out of Picasa and have been very happy with the results.
Once you download Picasa, it is easy to figure out how to 'Import' (there's a button) your pictures from your files into Picasa. (You can do them a file at a time just to see if you like it.)
SO, let’s say you are in Picasa and you want to select 4 or 5 pictures (you will see, once you experiment, that a header can be made with a bunch of photos or just one and still look good).
 You are going to select a photo and press the Collage button on the bottom of the window. (You can edit your pic first if you want....see the left hand side for tons of options.)
 In the Settings choices, you will choose Picture Pile because it allows you to work with a bunch of photos and manipulate them around in tons of ways.
  Click and hold on your photo and drag it to the corner (or wherever you want it). (By the way…you can see that you can select different colors for the background…experiment away…the possibilities are endless. Also under background options you can select "Use Image". You can download free scrapbook paper and import that into Picasa and use that as a background image if you want something besides a solid color. I did this from here. You will see in my September banner I have chosen a pattern, but the one I have for August I chose a white background.)
  See that little grey circle on the photo? That allows you to make the photo bigger or smaller and also allows you to manipulate the angle…crooked or straight, and allows you to move it everywhere. If you look in the Settings box, you can also chose to add a white border, or a Polaroid border, or create a shadow on your photo.
 Now you want to add more pictures. Click Clips right next to Settings. If you don’t see the photos you want to add go to Get More and it will take you back to your Picasa files. Click on your pictures there and then go back to the Collage file on top…see that button…next to Library. The picture you clicked on will show up in the little Collage window. Press the + button and it will be added. If you change your mind click on the photo you don’t want and press Remove. (You can also press View And Edit if you decide you want to use some of the cool editing features in Picasa to make your picture better-looking.)
 For this example, I am lining up my photos as straight and evenly spaced as I can get them. Remember, the possibilities are endless though...they don't have to be straight. I DO try to keep them on the top 1/2 of the collage..yes, it looks funny at first, but you want your collage to be long and skinny..you will crop that bottom half off later, after you add text. Just work with the top 1/2 when making a header.
 When I’m set I press Create Collage.
 That brings me back to the main Picasa page. I find my created Collage in the Library file, and click on it. Now what comes up is the basic editing features…Basic Fixes.
 I find the Text button and press that…there you have TONS of choices of type. Play around and see what you like best…this is the “funnest” part…you can move the text where ever you want (even on top of the photos), make it whatever size you want (keep it on the page!), pick the opacity of the text, and determine the color you want it…it has the same grey circle that you manipulate around. Remember though…you want it rather long and skinny like a header normally looks so keep it up there in the 1/2 of the space provided.
 If you want to create a whole different grouping text, you can do that too. Just click the phrase you are finished with and move your cursor to a new spot…it doesn’t have to be the spot you want the type to show up, because remember…you can move it. Now you can choose the color, font and size of your new phrase.
 After you have your words down, click the Apply button and you will go back to the basic Edits. You are going to Crop your Collage so it looks like a header, not a huge photo, so press Crop. I make it really even on all sides and bring the crop right up under the writing.
  Press Apply when you are finished.
 You are going to Export (see that button on the bottom?) your collage to your photo files. When you press Export a window like this will show up. That little slider bar lets you choose the size.
I used 800 for my banner.


NOW, go to your blog and press the Layout tab. Press Edit on the header part (where your title is.)
 Choose your Image (your collage) from your Files where you sent it. Make sure you press the “Instead of title and description” button first, and make sure the Shrink To Fit button is NOT checked before you upload your picture.
 Press Save. If the Collage seems too big for you, just resend your collage at the next smaller size when Exporting to your photo files from Picasa.
If the blog banner isn't centered, you will need to go into the Template, go to "Customize", find Advanced, scroll down to CSS, and copy and past this code to the CSS:
#header-inner img {margin: 0 auto;}
Press Enter (you can see your blog header move to the center after pressing Enter) and then Save.
Here's some great advice: Start a new blog...a sample, "fool around" blog, and just try stuff out on it. Google some tutorials...that's how I learned. In your Settings, you can choose to make that Sample Blog private, and hide it on your profile so no one sees it. Then play away! You can see how things look on your Sample Blog first, practice, and then try it out on your new blog.
Check out these cute headers made from this tutorial:
I'm so proud of you! (and I'm proud of me too, for actually explaining something and having it make any sense for once.)
Melissa's
Tawny's
Rachel's
Jennifer's
Beth's
Mandy's
Abbey's
Donna's
Casey's
Jodi's
Lindley's
Jaclyn's
Kelly's
Vicki's
Jenny's
Sara's
Cheryl's
(If you have one you would like to share, leave a comment below!)
If you want to get a little more creative with different fonts and scrapbook paper backgrounds, or are interested in making scrapbook pages with Picasa HERE is a great tutorial.
If you are still confused, HERE is a great step by step video series of tutorials on making collages with Picasa that can help you get started.


Thanks so much for sharing this. I was able to finally center my blog header as well as delete the border. I will def. refer back to this when I decided to create a new one. I also shared this on my blog (linking to your site). I hope you don't mind. I just thought this was great information!
ReplyDeleteOops I forgot to leave the link to my blog so you could see the post if you like. Sorry, my brain is not working today. :)
ReplyDeletehttp://the-not-so-functional-housewife.blogspot.com/
Looking forward to trying this soon! Thanks for the step by step information!
ReplyDeleteWhat a great post! So neat! Any thoughts on doing this for a wordpress.org blog?
ReplyDeletewww.inamirrordimly.net
My header is the right lenght but too tall. How can I fix this?
ReplyDeleteThank you.
http://beitafamily.blogspot.com/
Thank you thank you thank you!! My blog looks more like "me" now! I had no idea it would be so easy!
ReplyDeleteYour blog is amazing!!! Thanks for the simple tutorial!!! :)
ReplyDeleteThank you SO MUCH! I just designed a blog for my boys to trade LEGO guys and wanted to use their stuff. After a few false starts, your tutorial made it happen. Thank you!!
ReplyDeletehttp://legotraders.blogspot.com/
Thanks a lot for all your help! Here's my new header! I was excited because I was able to utilize a previous header that I could never figure out how to get it to work on my blog from photo shop, it was always fuzzy, except I was able to add pictures to it as well with this tutorial, and it's no longer fuzzy!
ReplyDeletehttp://jcbelsan.blogspot.com/
-Chelsea
Thanks for an awesome tutorial!!! I love my new blog header. It was so easy :)
ReplyDeleteThank you!!! This was so helpful :)
ReplyDeleteI made a new banner for my little blog, thanks to you :)
http://jennaflannery.blogspot.com/
This was a great post! I followed you tutorial and made a header for my blog. You can see it here: http://liverichandfree.blogspot.com/
ReplyDeleteThanks again! Jane
Yeah! I came over from Money Saving Mom and LOVED finding your blog.
ReplyDeleteThank you for the wonderul tutorial for headers. I just re-vamped by header and blog. Here is my new header ... http://theblackburnbuzz.blogspot.com/
Look forward to stopping back soon! :)
I bookmarked this post AGES ago. I finally messed around last night using our Christmas pictures. Thank you so much. Come check it out.
ReplyDeletewww.momofthreeormore.blogspot.com
A friend just sent me this link, and I made a header while my 2-year-old quadruplets were napping today. Thanks so much for explaining how easy it is to do ... I've often wished I could pay someone to make a header for me, and now I don't have to!
ReplyDeleteKeep up with me, Ted, and our Fab Four at four-by-two.blogspot.com.
Wow! I am so not computer savvy but I actually could follow your directions! It isn't perfect yet but I think I understand the process enough to change it to just the way I want it!
ReplyDeleteThanks!
Gina
You are the best! That was amazingly simple with your step by step instructions. Now I really like the way my blog header looks.
ReplyDeleteMany thanks!
Karen
www.clevercouponer.blogspot.com
Thank you so much for this post!! Very awesome of you :)
ReplyDeleteHi! I'm a new follower!
ReplyDeleteThank you so much for this tutorial! I just started a blog and made my header from these instructions!
ReplyDeleteI am SO excited!!! I just finished making my new header thanks to you!! You made it unbelievably easy.
ReplyDeleteThank you so, so much!!
How wonderful that you've posted this. . .I so appreciate the help, and you can see my collage at www.maybeacrafted.blogspot.com
ReplyDeleteThanks for the details on how to do this. I love Picasa, especially the collages. I used them to make thank you cards for my daughter's birthday party.
ReplyDeleteI did make a header with it for my business. I didn't like my blog before, but now I love it!
www.touchofhomelearning.blogspot.com
I stayed up WAY to late making my easy blog header from your tutoria...but in the meantime I was exploring your site more and realized that you interviewed my cousin, Alyssa Welch, for your women of faith interviews. What a small world. Love you blog. Check ours out.
ReplyDeletewww.thehobbshappenings.blogspot.com
Love this! I'm gunna bookmark this post in case any of my clients need help with this subject :)
ReplyDeletebest tutorial ever!!! thank you so much!
ReplyDeletehere's mine if you want to take a gander
andrewandkrystal.blogspot.com
Thank you so much for this (INCREDIBLY EASY TO FOLLOW!) tutorial! I too wanted to change the look of my blog and didn't want to pay someone to do it. I LOVE this!
ReplyDeletehttp://keelysteger.blogspot.com/
I loved this tutorial! I used it to create my banner for my blog but ended up taking the pictures out of the banner so I could use the photos as my navigation. But it came out looking EXACTLY how I made it with Picasa and this tutorial! Thanks.
ReplyDeleteKate
http://teachingwhatisgood.com/
Thanks you so much! I was able to do one can't believe it myself. I am planning on using it over and over again, I just need to start learning taking nice pictures.
ReplyDeleteHere is my blog: www.thecounseler.com
Again Thanks!
Eulalie.
From Luxembourg
I did it! Thank you for this tutorial, it was perfect for my needs!
ReplyDeletehttp://charlottelaughs.blogspot.com/2011/02/delusional-or-just-confident.html
I used your tutorial for a new blog header, thank you! (http://jphillips4.blogspot.com/)
ReplyDeleteThanks so much for posting this! Not nearly as intimidating as I thought it would be.
ReplyDeletethefamilythatplaystogether.com
Thank you so much! I'm new to blogging and am so happy with how it's turning out!!
ReplyDeletewww.theleverettlife.blogspot.com
Thank you so much for a great tutorial! I used photoshop but can't say I would have thought of it without your help! I love your blog and enjoy your writing! You express things so well and we share similar values on life! Here's my lastest header round up for my first few headers! Thanks again! http://gilliganchronicles.blogspot.com/2011/03/header-round-up.html
ReplyDeleteThanks so much for the tutorial! I used photoshop but I have to give you complete credit for the idea! You can see my first few headers...
ReplyDeletehttp://gilliganchronicles.blogspot.com/2011/03/header-round-up.html
Love your blog and your writing!
THANK YOU for the awesome tutorial! I clicked on every name that was listed to see everyone's example and the funny thing is there are 2 blogs layouts I love out of ALL the blogs I visit...one is yours (adorable!) and the other is Cheryl's (the last one on your list!) How funny that I love her banner and she learned it from you! I think this tutorial will be on my summer "to do" list! Thanks again...I love your blog! Visit it every day!
ReplyDeleteTHANK YOU so very much for this EXCELLENT tutorial!! I read about these instructions when Crystal at MSM posted about them this past January. I kept it bookmarked in my mind for that day I would be able to sit down and play around with my blog. Last night was it! I designed a new blog header and just posted about it here giving you the credit:
ReplyDeletehttp://blessedfemininity.blogspot.com/2011/03/new-blog-design.html
Just wanted to give you my sincere thanks!!
Blessings,
Katie
thank you so much! I'm so excited for this! One question though... when I choose Minima stretch, how do I get it to look like yours with all my text? Mine goes clear to the left side of the screen and I want it more in the middle like yours is. What settings do i need to choose to get it that way? Thanks so much! you are amazing!
ReplyDeleteI have made a couple of headers with the help of your tutorial. My latest one is my favorite. Thanks so much for your help!
ReplyDeletewww.bitterrootmama.blogspot.com
Thank you so much for this it is genius, I have used it to make a header for my professional website www.victoriaawalker.co.uk next up will be my personal blog.
ReplyDeletethanks again.
Victoria
Thank you so much for the tutorial. My friend Amy linked to it, and I finally was able to make my own header! What a treat!
ReplyDeletehttp://thepeanutpatch.blogspot.com/
Great tutorial!! I have my header all made and exported. The template is installed on my blog. Now I just can't get the header to save... I made sure to check "instead of title and description" and also have shrink to fit unchecked. Tried it several times and just can't get it to save. It will load and show up in the preview though. Help! Any thoughts??
ReplyDeleteI made one using Picasa. Thanks for the great tutorial!!! Feel free to add my blog,
ReplyDeletewww.familyeverafter.blogspot.com
THank you ONCE AGAIN!! I changed my header again and as usual - I come back to your tutorial EACH time to help me out!!!
ReplyDeleteMaria :)
http://craftycre8tions.blogspot.com
Thanks a bunch! I did it!!! I plan to keep the main photo on the left (where my blog title is) and rotate the others seasonally or as the spirit moves me. :) THANKS THANKS THANKS!!!
ReplyDeleteLaura @ DancingJoyful@blogspot.com
I had so much fun folloing your tutorial to make my own header! thanks so much for this!
ReplyDeletehttp://ourlifeinthebigcity.blogspot.com
Thanks so much for the tutorial! I've been using Picasa for years and never tried the collage option. It was so easy once I got the hang of it. Now I can switch out the pictures whenever I feel like it. I get bored with the same header all the time. This way I can showcase my sketches and keep things interesting. Check out my Everyday Artist blog header ... http://www.lesliefehling.com/
ReplyDeleteThank you so much!! I googled 'how to make a free blogger header' and this popped up. Your tutorial is wonderful! I've been using Picasa for years, but had no idea it could do this. I really appreciate the time you put into the tutorial.
ReplyDeleteThank you so much for this tutorial. I've had Picasa for over a year now and had no idea it was so easy to make up headers like yours.
ReplyDeleteI'll be making new ones all the time now :0)
Liz from Bonnie Scotland x
Thank you so much for such a great idea. Your directions are incredibly clear and I had so much fun creating my header. Click over to see. Thanks!
ReplyDeleteOkay, I finally did this after procrastinating. IT TOOK ME ALL DAY! But only because I have a new Mac and can't do anything on it so I was working my PC and Mac back and forth! Your instructions ARE GREAT!!! No dinner for hubby...I'm in trouble...must be off computer until tomorrow after he's left for work...not his demand, my good sense. Thanks so much for this!!!!
ReplyDeleteI found your blog through http://www.oldcentennialfarmhouse.com/ I've really been struggling with a blog header since I created my blog. Thank you thank you thank you!!!!
ReplyDeleteThank you so much! This info was so helpful :)
ReplyDeleteWow! What a GREAT tutorial! My farm blog looks so much better now... and the pictures in my header are actual pics from our farm! Thank you so much! If I can follow along and figure this out, anyone can! Thanks again!
ReplyDeletehttp://GoodOldDaysFarm.blogspot.com
Alina Joy
Yay! Have just made a new header following your instructions! Not sure I'm 100% happy with it, but now I know how to do it, there'll be no stopping me :) xxx
ReplyDeleteHi Sarah, used your tutorial on making a header in Picasa. It was so so easy. Thank you. I have linked to this tutorial. I hope you don't mind.
ReplyDeleteJenni http://pastlifefuturepromise.blogspot.com/
This is so great! I've used the collage option before but it never occured to me to use it for my header! I've been playing around with some in Paint, but clearly that does not compare. I can't wait to make my header this weekend! Thanks for the tutorial!!
ReplyDeleteThank you! Thank you! Thank you! I used your easy directions and now love, love, love my blog look!
ReplyDeleteWONDERFUL!!!Thank you SO for your help.. I am so encouraged I could cry! I ahve been needing help for months and felt overwhelmed with info..My daughter and I out a neat little header together..
ReplyDeleteYou did a SUPER job with instructions..and so friendly and sweet!
Bless you and thank you for your hard work..
Tamara
What a great tutorial! I have made my first attempt...there is room for improvement, but I'm happy for now!
ReplyDeletewww.redhenhome.blogspot.com
thanks, great tutorial!!
ReplyDeleteThis helped me so much. THANK YOU. Ya'll. Check out my new header!
ReplyDeleteindiraadams.blogspot.com
Thank you, thank you, thank you! I'm new at blogging and was looking for this exact information! I happened to run across your blog last night and couldn't believe it. You explained it so well...I created a beautiful banner for my header last night! Just followed your steps and it turned out great! Thanks again! www.artbookstea.blogspot.com
ReplyDeleteAha! I did it all by myself. :) Thanks to you now I have a more professional looking banner without the hassle of having to figure out PSP.
ReplyDeleteCheck out my blog here: http://sketchesbymary.blogspot.com
Blessings, Mary
thanks for the tutorial...love my new personalized blog header i just made following your instructions!!!
ReplyDeletehttp://creativecents.blogspot.com/
I finally had time to sit down and change my template. Your tutorial was very helpful. I'm excited to be able to change my pictures when I want. I have a little more work to do on the template but I'm pleased with the changes.
ReplyDeleteI just used this to create my blog header and I can't thank you enough!
ReplyDeleteThank You so much for posting this. God bless the person you are.
ReplyDeleteSarah, I finally got brave enough to try your tutorial....I'm a huge chicken when it comes to trying something new.
ReplyDeleteI did it and I think it came out great. I didn't add a bunch of pics, just my same old header, but with an updated pic. I was afraid to update it for the longest time, because I didn't want to screw up my blog, but you broke the steps down so easily I swear even a big dummy like me could do it.
Thanks!
YOU ROCK!!
I can't thank you enough, this was so straightforward, and easy to follow. I loved making my new header.
ReplyDeleteJen @ Muddy Boot Dreams
Hi Sarah,
ReplyDeleteI see you get a lot of thank you comments on this blogpost and I just wanted to add one more ;-) Thanks to your help I now know how to create brilliant headers for my blog ;-) Today, I also wrote a short blog (in Dutch) on webdesign and as I wanted your to give website (and also that of The Girl Creative and Sneaky Momma Blogdesign) the credits you deserve for helping me out, I mentioned you and placed also your button in the blogpost. Just wanted to thank you in this way!
Take care!
I just want to thank you so much for this tutorial. I'm creating my first blog and I've had such a headache trying to figure out how to make a banner that showcases who I am and what I'm about. Your tutorial was incredibly helpful and made my day! Thanks again.
ReplyDeleteThank you so much for this tutorial. I've really been feeling called to try and create a whole new look for my site but have freaked out every time I tried to create a simple look for the header. You made it possible. Thank you!
ReplyDeletemelissanesdahl.blogspot.com
Almost exactly two years after this post, and it's still awesome!!! Thank you so much!!! Great tutorial!!!
ReplyDeletethank you so much for the tutorial! i've made a header with pictures and text but how do you get some of the other elements on the header? like the green "bubble" line you've used before?
ReplyDeleteI use the fonts to do that...I have some called WingDings, and they have all sorts of shapes.
ReplyDeleteThanks so much for a great post! I was on the verge of paying someone to do this for me, but your tutorial made it so easy!
ReplyDeleteI am happy with the results on my blog, but I do have one question. My header on my blog is showing up with a grayish square behind it. I didn't add any background color in picasa- do you know how to remove this? I wanted it all white to match the background. Thanks so much!!
Melanie
bearrabbitbear.blogspot.com
bearrabbitbear@hotmail.com
Hi Sarah. Thank you so much for this tutorial. I have been using it for some time now! Please go on over to my blog and see them.
ReplyDeletewww.coffeebeansdailies.blogspot.com
These ladies are really talented! I need to get MORE creative!
Hi
ReplyDeleteI thought I'd comment as I found this tutorial SOOOO helpful with making my own banner. I hated my old one and I now love my new one. I also managed to work out how to make my own button. This might not sound like a big deal, but to me, as complete beginner with all things website-y and HTML-y, it was a BIG achievement.
I've had loads of compliments on my new banner and people asking how I did it, so I've been pointing them all in your direction.
Thank-you so much.
x
You are a lifesaver! I just made a simple header for one of my blogs and will do the other when I have no toddler in my lap!
ReplyDeleteThis is exactly what I've been looking for - free and idiot-proof instructions. How very generous of you for sharing this info. I can't wait to us it on my blog. THANK YOU!!!!
ReplyDeleteA big thank you for this. I had been wondering how to fix my banner. The directions were so easy even I could figure them out. Thank you so much!
ReplyDeleteThankyou so much for this great tutorial on how to make a blog header, I have wanted to know how to do this for ages but never knew how!
ReplyDeleteI have put my new header up if you wish to put me on the link list.
Thankyou so much!
Lynn
Love this and your blog!!! Thank you so much!!!
ReplyDeleteI'm SO HAPPY I found this! I was contemplating paying someone to help me personalize my blog - but your tutorial helped me do exactly what I wanted. Here's my blog:
ReplyDeletehttp://www.emmainmommyland.blogspot.com
I plan on making new headers as my pregnancy adventure advances. I really can't wait! THANK YOU :o)
I found your tutorial a while back and made my own header. Now, I've changed it again. Thanks for sharing!
ReplyDeleteThanks for the help! My collage is showing up only on the right hand side, not centered. Any advice?
ReplyDeleteThank you so much for this, I've been messing about with it most of the day and finally have a header which is a little more me!
ReplyDeleteThanks so much! I am going to check this out =)
ReplyDeleteI am visiting from Living, Laughing, and Loving
~Kelly
Thank you so so so so much for this tutorial! It was very helpful :) I loved the step-by-step instructions. By far the best header tutorial I've come across!
ReplyDeletethankyou sososososososo much for the great tutorial!! finally, my dream came true and I could design my own header! thankyou so much again!
ReplyDeleteIf you would like to see my masterpiece :)
this is my blog:
www.annieswaytoawesomeness.blogspot.com
thankyou so much, I absolutely adore your blog!
Thank you so much for this post, I was looking at ways to create buttons and headers for blogger. And yours is an easy tutorial. This also gives me an idea,I am going to try this with my own drawings.
ReplyDeleteI have never used Picasa, but I do use a free editing software Paint.Net.
Thanks again.
Thanks for this! I used graphics rather than pics & it turned out great!
ReplyDeletewww.bearrabbitbear.com
I used this tutorial again to create my blog header. This has helped me fight off headaches. Thank you so much!!
ReplyDeleteWaheyyy!! I just made my new header :-) What do you think.....
ReplyDeletehttp://boldnbella.blogspot.com/
Thanks!
Jojo x x
After reading your blog since summer... I finally decided to do a collage banner. I thank you for the step by step instructions, and I do plan on changing it again once I get better at it. I don't want it to look the same as yours. For now, I hope you don't mind. Of course, the pictures, quote, and title of blog are different!
ReplyDeleteTake care, and thanks again for sharing the tutorial, and your life on the web. You seem like my kind of gal! xo
Oh! If you want to check out the banner on my blog...the URL is: rjorgensenfamily.blogspot.com (a.k.a. A Harmonious Combination)
ReplyDeleteThanks again!
Thanks for the great tutorial! I used this to add a new header to my blog last night.
ReplyDeletewww.interlacingloops.blogspot.com
AWE.SOME!! Your post was just what I needed... my photoshop has a glich and I needed a quick fix!! Perfect and simple. LOVE. If you are curious about my header... it is simple - but just what I needed... hop on over and jump in the leaves over at my place: afamilytreehouse.blogspot.com
ReplyDeleteI cannot believe how I've struggled in the past trying to get my header to look professional. I used *everything* but Picasa and just found your post today. THANK YOU for making it so easy to understand. I hope you'll go take a look at it :)
ReplyDeleteHI! Thanks so much for this tutorial. I have had Picasa installed for a long time and I use it once in a great while. I never even tried to use the collage tab. I have photoshop and I could have used it to create a header but this is so much easier. I dragged the pictures I wanted to use into the collage and then clicked where it said "mosiac" and just put the pictures in a nice collage and bam! there's my header! I had to make sure it was the correct width for my blog but that wasn't hard to figure out. here it is if you want to check it out! Thanks! http://www.kdmphotography.blogspot.com/
ReplyDeleteSeriously girl, thank you! I am sharing it on twitter for others. So simple and easy. Can't wait to play with this next weekend and make a million more!!
ReplyDeleteletsjustbuildahouse.blogspot.com
You just made my day!! Thank you so much for this! Now I'm going to explore your blog for other fun-ness. Here's how my banner turned out: http://www.auroraspitfire.blogspot.com/
ReplyDeletethank you SO much for posting this tutorial! i changed the banner on my blog and ended up changing the entire look of it as well! :) it's much busier than it was, but i think that's an improvement. :)
ReplyDeletehttp://www.mamazilla.blogspot.com
Iris Beard sent me and I AM SO GRATEFUL. ALthough I had put up a 'header' it wasn't great. AT ALL. Now, after three hours (because two little kids do not understand my need for undivided attention) I have a pretty snappy header and will probably rotate a few in and out here and there! There are LOTS of changes in picasa since 2009 so I was struggling for a while but now...PRETTY! YOU are a Goddess second only to Lady Iris.
ReplyDeleteI've used your tutorial before for my old blog, and I just wanted to say thank you again! I made a new header using your tutorial again!
ReplyDeletehttp://thebiggestmuch.blogspot.com/
Thank you!
Jaclyn
Thank you thank you thank you for this AWESOME tutorial!!! I never could'ave made my new header without you! I've been looking for a new photo editor since Picnik will be no more...and I'm really loving Picasa alot! So thank you for all of your help and advice!!!!!! ♥
ReplyDeletexoxo laurie
Thanks a ton! I wanted to update my header, but forgot how I created mine 2 or 3 years ago. This was a great refresher.
ReplyDeleteThank you for this post, I am just starting out with my blog and don't really understand how to use blogs!! I'm going to try out the header though because I love how yours looks and I think your step by step guide will help me!!! Thanks Haze
ReplyDeletehello!!
ReplyDeleteI just recently decided to make a blog and I am so HAPPY to have found this GREAT post of yours about making a banner!! I did it all by myself because of your help! THANK YOU SO MUCH!
I really hope you could drop by my channel soon and see about it!
By the way, I am a youtube guru as well, if you have time check my videos about BEAUTY and STYLE! THANKS AGAIN!
http://mineeh11.blogspot.com/
LOVE: Arrienne
Thank you! I was so happy to find this...
ReplyDeletePeace,
Heather
WIP
http://annebelle-inprogress.blogspot.com/
Thank you--I am so happy to know how to do this.
ReplyDeletePeace!
Thank you soooooo much for this tutorial! I am new to blogging and new to Picasa, but you made the process so easy for me to create my own banner header. :)
ReplyDeletewww.hello-newday.blogspot.com
Hey! Love your blog! Very precious!
ReplyDeleteI use Picasa a lot (like everyday) and never have I thought to make a collage for my blog with "personal" pictures. Well, I did it. And, I am I loving it. My blog needed that more personal touch and this did it. :D
Thanks!!!
[ www.stephanyhyder.blogspot.com ]
Thank you for the great tutorial. I now have a banner I love and can change it so easily.
ReplyDeleteCheers,
Debé
how great going to try it now thanks so much for sharing
ReplyDeleteThank you times a million for posting this! I have been trying to figure out what to do with my super duper boring blog but didn't want to pay to have someone make it fancy!
ReplyDeleteHere is the link to my blog if you want to see the fruit of you much appreciated labor in creating this tutorial.
http://whitneymarie19.blogspot.com/
thanks again!
Whitney
Thanks for the great tutorial! Just made my own new header - yay!
ReplyDeletehttp://voyage-on.blogspot.com/
Hi! I just found this tutorial and I cannot tell you how happy and excited I am about it! Woohoo! Thank you, thank you, thank you, SO very much! Here is my blog's new and adorable look:
ReplyDeletehttp://katieannsmama.blogspot.com/
Thank you, thank you, thank you. After going round and round in circles and not getting anywhere, I read your tutorial and hey presto my blog now has a banner.
ReplyDeleteThank you for such a great tutorial. I had gone round and round in circles, nearly tearing my hair out and then I found your blog and hey presto, I now have a header. Cheers.
ReplyDeletewww.craftnessible.blogspot.com
Vanessa
Hello, this is brilliant!!. I have just made my own header and got rid of the one that I had and hated, thank you so much.
ReplyDeletehttp://sallieskitchen.blogspot.co.uk/
thank you so much this is just what I needed, I've got rid of my horrible header and got a lovely new one.
ReplyDeletehttp://sallieskitchen.blogspot.co.uk/
I can't describe how many times this post has helped me with my blog and yet it was only today that I found how to change the template to 'minmal' or whatever its called!
ReplyDeletePlease keep this post here, thank you!
Check out my blog :)
I can't describe how many times this post has helped me with my blog and yet it was only today that I found how to change the template to 'minmal' or whatever its called!
ReplyDeletePlease keep this post here, thank you!
Check out my blog :)
Hey there!
ReplyDeleteThank you so so much, this post has been a total magic trick! I'm so proud that I've been able to do this and make my blog look so much more professional (well ish, it was still made by me haha)
Thanks again, I'll be sure to mention you to credit my new header!
xxxBxxx
thank you thank you for this post. i have been wanting to make my blog look a little less amatuer. your tutorial helped me so much with that! i will definitely be back! stop by sometime! www.thesugar-coated.blogspot.com
ReplyDeleteWow! I did it following your tutorial and I am ecstatic about the result! Check my new header out at mommyvignettes.blogspot.com
ReplyDeleteI loved it! It helped soo much! It was simple and easy and the best looking thing ever!
ReplyDeletecheck it out at:
http://www.creativeconfessions123.blogspot.com.au
Thanks! I use this often!
ReplyDeleteCongratulations on your baby news!
http://www.mypricelessfishers.com
thank you very much for this tutorial! you are absolutely right! this was a breeze to do! my blog is still a work in progress (about time i changed the look) but it's gettin' there, thanks to you!
ReplyDelete♥♥
IntoxicatedChameleon
I am so glad I stumbled upon you tutorial!!! I followed your directions with a few tries and bam I had an awesome banner to match my new blog!!! You can see my banner here!
ReplyDeleteTt@NeverEndingStoriesBookBlog http://neverendingstoriesblog.blogspot.com/
Thanks for the tutorial! I had a quick question..how did you get your labels at the top under your header to look that way? I tried switching to Minima stretch like you instructed and it put it in a wierd list or "cloud". Any help would be great! My header though at first try I am very pleased!! Thank you!!
ReplyDeleteWow!! It's amazing that you posted this in 2009, and here we are in 2012 STILL using your tutorial! :) I have been a blog-slacker lately, but now that school is about to be out for summer, I'm ready to get back at it! (Hubs is ready for me to start, too. I've got projects parts lying around the house waiting for me to do some DIY magic on them!) Thanks so much for such an easy to understand tutorial. I just created my first header with Picasa! Check it out at
ReplyDeletecall-me-nif dot blogspot dot com.
Happy Blogging!
Love,
Nif
Thanks so much for your wonderful tutorial! I've been a blog-slacker for a while, but now that school's almost out I'm ready to get back in gear. Since Picnik is no longer available, I needed something new to use to create blog headers. Your easy-to-follow instructions were just what I needed. Check out my new header at
ReplyDeletecall-me-nif dot blogspot dot com.
Happy Blogging!
Lovem
Nif
Just used this, and it worked perfectly. THANK YOU! No more waiting for my computer science husband to do it for me. ;)
ReplyDeleteThank you for all of your help! This was so easy to do. I am a new blogger and needed a fun banner to make my blog look nice. Thank you again!
ReplyDeleteThank you sooo much for creating this. I was able to create and import and then modify for my typepad blog. Thanks again!
ReplyDeleteThank you so much for giving the step-by-step. I have had Picasa for over a year and was going to delete it because i couldnt find a use for it. But now I know what it can do for me and my business. Please check out the work you helped me to complete!
ReplyDeletewww.frommaruki@blogspot.com
To see what else I learded please visit my company's site:
www.Spoonfullofjelly.com
Thank you this is really helpful and practical too :-) I've made a trial one (think I may need to improve my photo taking before I do my final one!)
ReplyDeleteWow...finally i manage to do my header all by myself but of course with your greatest help. thanks a lot for your tuto..i would never make it without you.hihiihi...
ReplyDeletehere's mine..
www.minemineok.blogspot.com
thanks :)
I'd love to share my header! (although its very simple) You made this Oh so easy! THANK YOU!
ReplyDeletewww.makingamrs.blogspot.com
Used this awesome tutorial on my blog here:
ReplyDeletehttp://sophisticated-sisters.blogspot.com/
Thank you SO much!
Hi, thanks for the tips...I've just gone on to picasa3 with the help of your step by step instructions and came up with a nice header! :) I will definitely work on a better one later.
ReplyDeleteThanks
http://healthandfitnessvault.blogspot.co.uk/
I can not thank you enough for sharing this info. Thank you, thank you, thank you!!!! I appreciate it soooo much. I just started a blog 3 days ago and wanted to have a cute header and i had no idea of how DIY. Thanks to you I now have a header i am excited about...not only because i have a header but because i did it and learned something new. Thank you!!!!!
ReplyDeleteThis was sooo helpfull, thankyou for posting!!!
ReplyDeleteI came across your tutorial on google, It's helped me so much and I love my new blog banner! Thank you :)
ReplyDeleteSarah, thank you so much for your tutorial. I was able to easily follow your instructions and have now completely transformed the look of my blog. I've just posted about it and wanted to let you know that I have linked back to your tutorial. Feel free to take a look ... http://thefamilyhales.blogspot.com/!
ReplyDeleteThanks so much for your kindness posting this tutorial... It helps alot... I'm a NEW KIDS ON THE BLOG.. so i literally blind about any of this... Now my blog have a cute header... Yaaayyy...
ReplyDeleteAgain, thanks...
Cheers...!!!
Thanks for the great, and easy to understand, tips!! Following from House of Helton at www.aleahhelton.blogspot.com
ReplyDeleteThank you so much for this blog post. I have succesfully created my own header.
ReplyDeletehttp://mynextendeavour.blogspot.ie/
Great tutorial! I finally made a banner, with your help! (Although I still have a lot of work to do!)
ReplyDeleteI followed your great tutorial but my images and lettering look fuzzy once they get on my blog. I tried different pixel options during the export process with no luck. Can you help??? I am brand new at this! Sorry!
ReplyDeleteThank you SOO much! I've been trying and trying to make a header, and I just couldn't make anything that I loved. Tonight I did! I'll be sharing the link to this post on my FB page so everyone can see how easy it is!
ReplyDeleteFeel free to add me to your list: www.nicolekester.blogspot.com (Between Two Rams)
Oh, and the same technique also makes GREAT Facebook covers!
ReplyDeleteI feel like this post is my belated (by two days) birthday present. Last night, I was just bemoaning my pitiful blog title; my poor husband tried to fight with Blogger, and his computer savvy did not help. No such luck. I then happened upon this post. Thanks for this awesomeness.
ReplyDeleteHere's what I created: http://littlebitofwowe.blogspot.com/
Thank you for this tutorial! I have been trying to figure out how to make a header for ages and this is by far the best tutorial I have found yet!
ReplyDeletehttp://forthoselittlemoments.blogspot.co.uk/
Hi there, just came across your post and I have now made a nice banner for my blog! It's at smoonbeam.blogspot.com
ReplyDeleteThanks so much for such a great tutorial!
I found this on Pinterest today. Thank you for this. I was about to buy an editing program so I could create FB covers and blog headers. Here's a look at my first try: http://mcquiltonfamily.blogspot.de/
ReplyDeleteThank you so much for such an easy steps. The only problem I am having is how to remove the boarder. I cant seem to find Header Wrapper anywhere! Please help!!
ReplyDeleteThank you so much for this! It was super easy to understand!!
ReplyDeleteI do have one question (for now)... on your screen shots of Picasa, I noticed you have a different "menu" on the bottom that included the Blogger symbol. Mine does not, nor does it have any of the other thing you have. How can I change that?
The screen shots are of an older version of Picasa. To find what you need now, you might have to look at the top tabs? Under create is where the Collage feature is kept now.
ReplyDeleteI know this is an older post but I found it, read it, and DID IT!
ReplyDeleteI am so excited I loved the way it turned out! You are so awesome. I posted about this tutorial on my new blog and set up a link back to you! I hope more people find this as useful as I did!
If you wanted to see the header I made, it is at
flipflapfly.blogspot.com
Thank you SO much!
-Camie
This was very helpful to me and so easy to understand! Thank you for teaching me how to use Picasa to make a header. Using your tutorial I created one for my cooking blog - http://cookinginquebec.blogspot.ca/
ReplyDeleteI'm not saying I did an excellent job, BUT THANK YOU FOR YOUR TUTORIAL! I have struggled with a boring blog page forever. I'm so happy now! THANKS!
ReplyDeletewhiskeytangohello.blogspot.com
pressedclovers.blogspot.com
Now to do my Etsy header! :) THANK YOU again!!!
Great tutorial, very helpful!
ReplyDeleteThis was so very helpful! I used PicMonkey instead of Picasa but you helped me get my header on my blog! Thank you, thank you, thank you! Without this tutorial I never would have known what to do!
ReplyDeleteThree years ago this month I started blogging and at the time a kind friend helped me with a header. I have wanted to change it for awhile now and with your fantastic tutorial, I managed to do it today. THANK YOU!! Wishing you a blessed Easter weekend. Georgia :)
ReplyDeletewww.love-and-lollipops.blogspot.com
Thank you very much for this easy to follow tutorial, I have now created a header I am finally pleased with.
ReplyDeleteThanks!
I just made mine over for the 3rd time using this tutorial. It's so simple and easy to make a quick change using this method. Love it!
ReplyDeletehttp://the-duke-family.blogspot.com/
Bam! This was perfect. Thank you.
ReplyDeleteThank you sooo much!!!! my blog was kinda boring before however now getting better. YOU ARE A LIFE SAVER HONESTLYYYY!!!!
ReplyDeletekhanombeautyblog.blogspot.com
I know you posted this a long time ago, but I was looking around on the web for a way site that I could use to create a banner when I stumbled across your blog post and realized I could make one myself! :-) Thank you so much for these instructions and for inspiring to make one on my own!
ReplyDelete<3<3<3, Leanna
I know this is an old post, but I just found it today. I have been fighting with Photoshop for days now and googled how to make a header. I love Picasa and your directions made creating my header so easy. Thanks so much.
ReplyDeleteThanks for the tips.
ReplyDeleteA comment on your screen shots: When I click on them, they don't get bigger, so I can't really read what's in the text boxes.
Your headers are beautiful.
I had fun making one for my blog:
somebodysdinner.blogspot.com
Gorgeous cover. Thank you
ReplyDeleteI know this is a super old post, but I remembered it and finally put it to good use. Check it out at: hardlyagoddess.com. I am super proud and so thankful to you for making it so easy to follow along. This was a day long project with constant interruptions, but I finally finished it. I think it is a keeper. Thanks!
ReplyDeleteAny way to get back to the Stretch or Minima Templates now (2014)? I accidentally changed mine and can't seem to get it back. :(
ReplyDeleteThank you! :) I actually used a different scrapbook program, but your tutorial was very helpful. my header has been this way for over a year, but I've not left my address! Thanks, Shannon
ReplyDeleteihavenogreaterjoy.wordpress.com
Thank you so much for this tutorial. I just made a new header and I love it!
ReplyDeleteLisa
http://loca-for-crafts.blogspot.com/
Thank you so much, for your detailed step by step instructions for ‘how to make a blog header’
ReplyDeleteI was able to follow your easy peasy instructions,and I have just changed mine and I'm really pleased . I have shown your link on my post.
You have made me one happy blogger